Follow these instructions to install and activate Windows 11.
https://www.microsoft.com/en-us/software-download/
If you don’t have Microsoft Windows 11 KEY license, then you can BUY Microsoft Windows 11 from this link.
https://dunhilcollectionllc.com/product/awindows11/
Part 01:
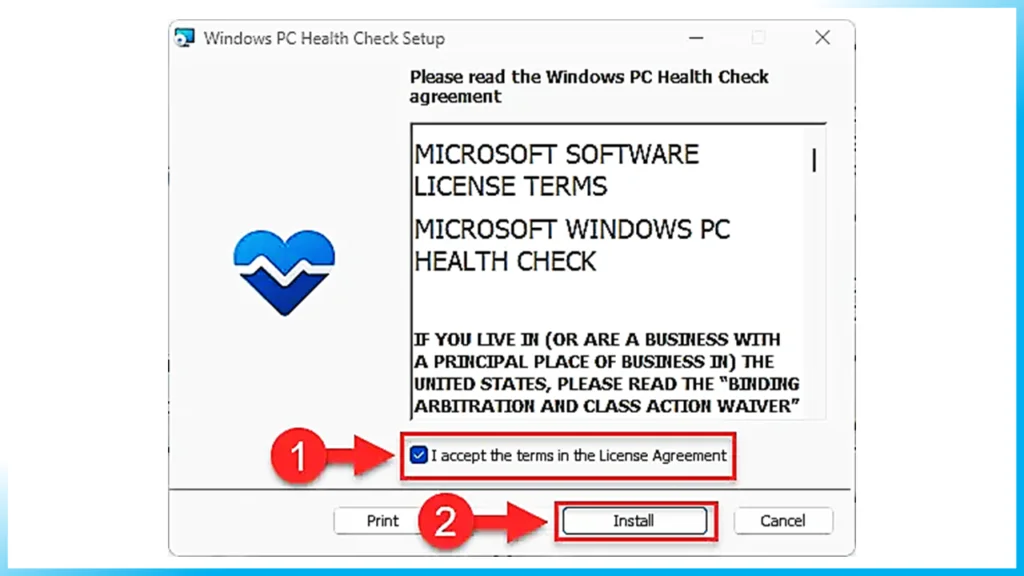
It can be difficult to check each of these specifications individually. However, you can use the PC Health Check app to check for Windows 11 requirements automatically. Here is how: On the target PC, download the PC Health Check app. Run the downloaded Windows PC Health Check Setup file. Agree to the licensing terms and click Install.
Part 02:
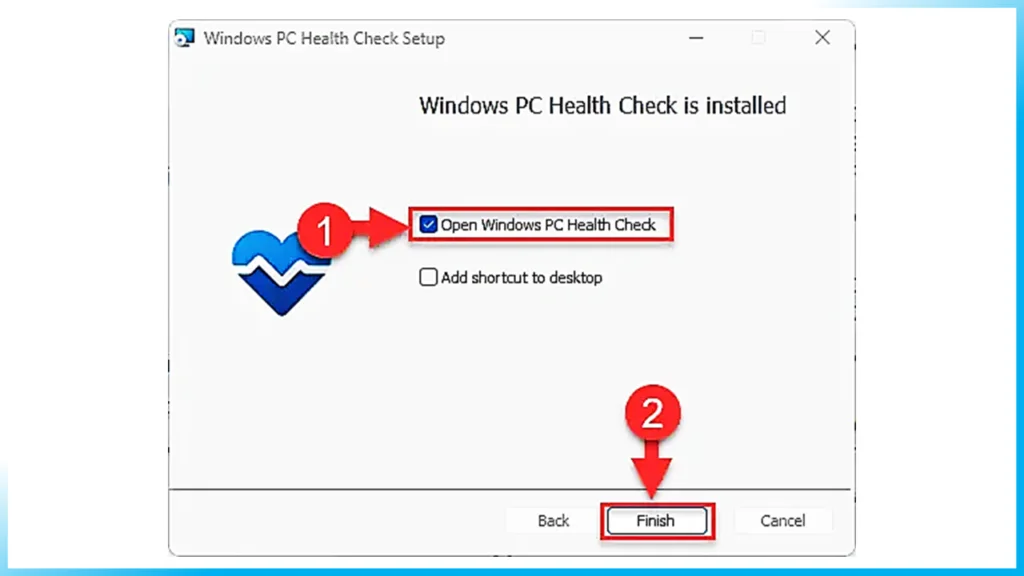
The app will now install.
When installed, run the PC Health Check app.
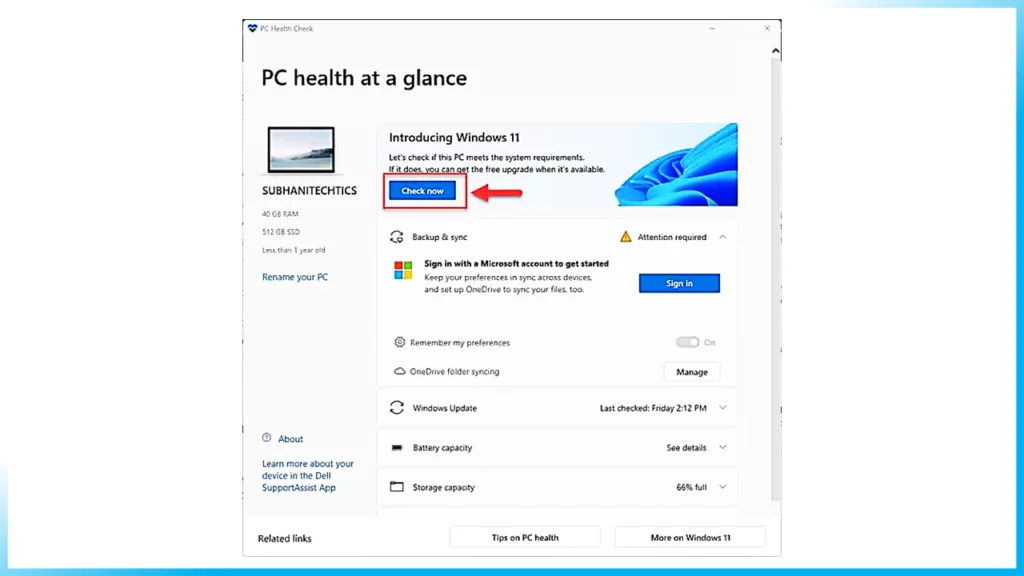
Part 03:
Inside the app, click “Check now.”
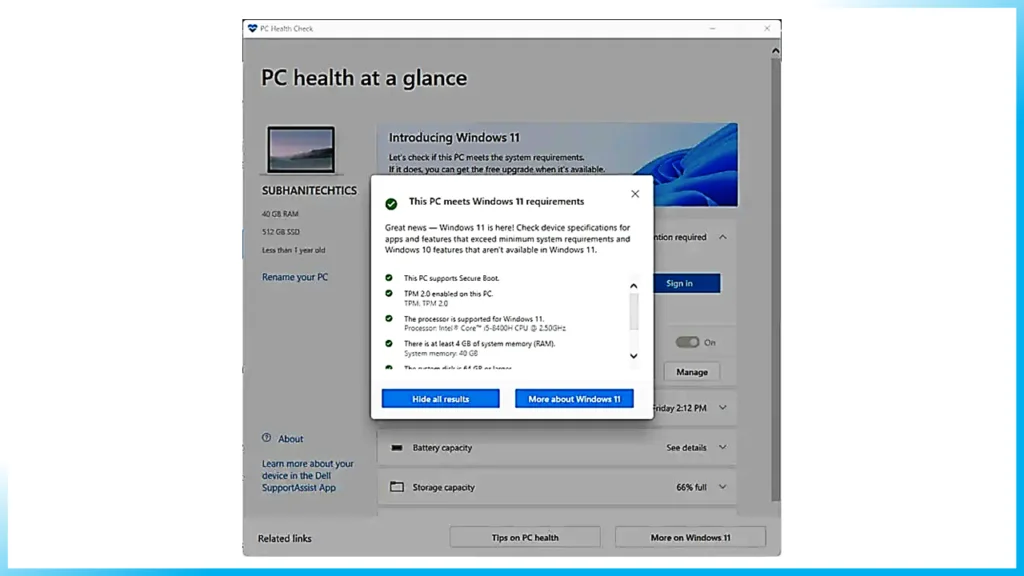
Part 04:
The app will now run a brief scan and let you know if your PC supports Windows 11.
View all results for Windows 11 requirements.
If your PC meets the minimum requirements for Windows 11, then you can proceed with the given topics below to create a bootable Windows 11 USB flash drive and then install it. However, if it doesn’t, then you either need to upgrade your system or bypass the requirements for Windows 11.
Step 01:
How to Create a Bootable Windows 11 USB Drive: Once you have downloaded the ISO image, you will need to create a bootable media drive so you can install Windows 11 on any system. You can create a bootable USB drive and a DVD. However, we suggest you create a USB drive, as it is more convenient.
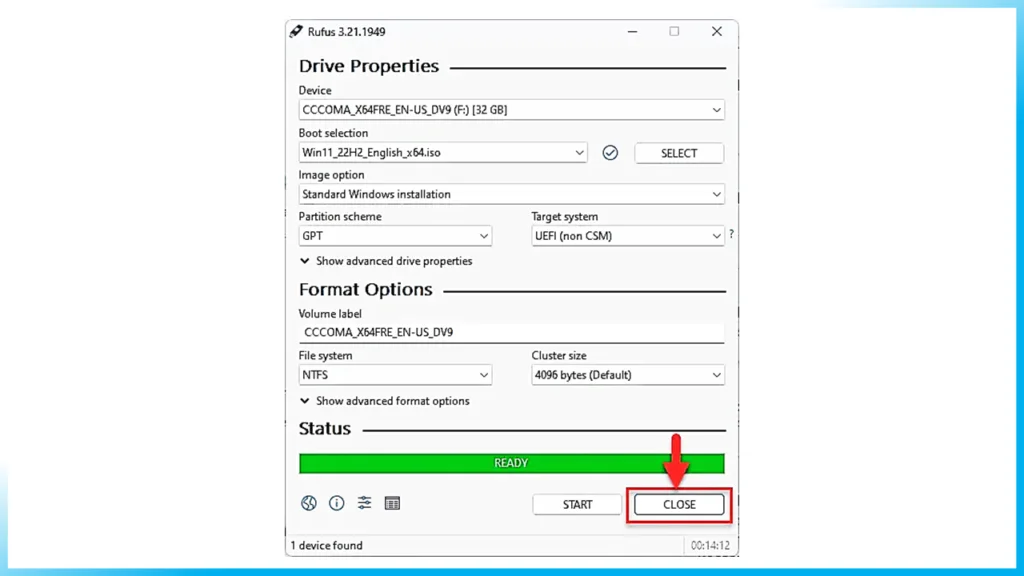
PART 01
Download Rufus from its website and install it on your computer. Once downloaded, run Rufus software.

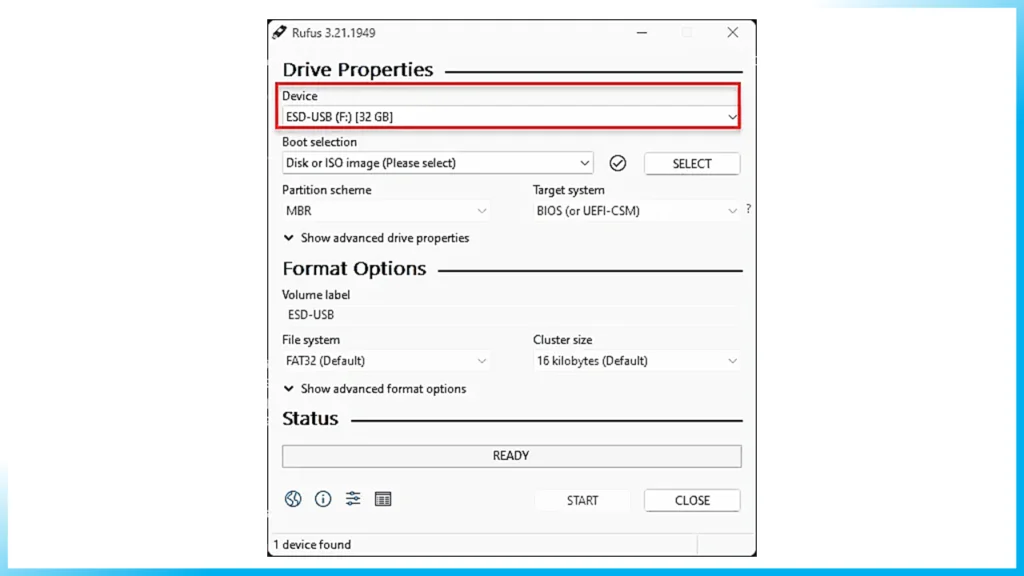
PART 02
Then, click “Select” under Boot selection, navigate to the downloaded Windows 11 ISO file, and select it.
PART 03
Leave the rest of the settings to their default values and click Start.

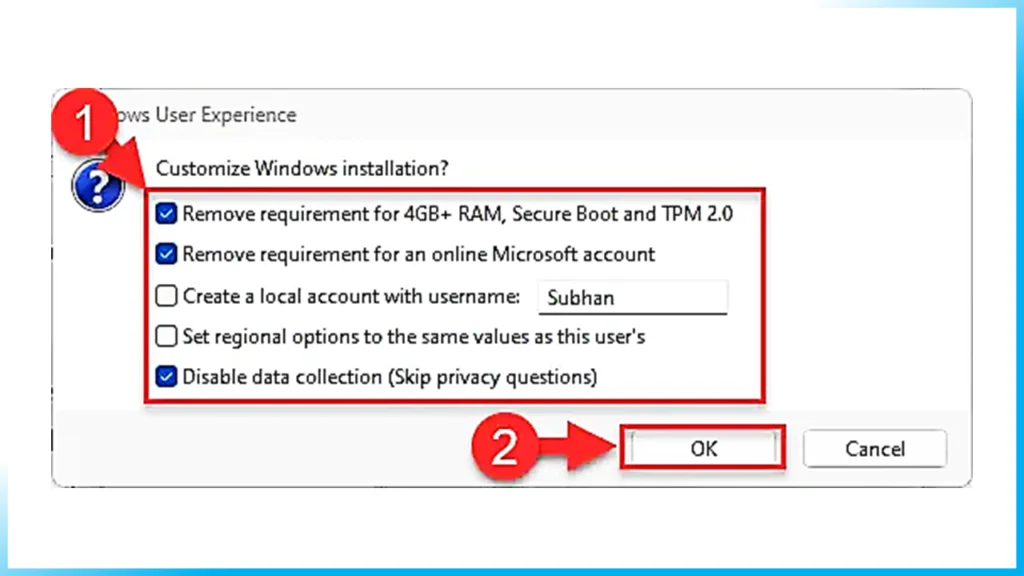
Select the Windows 11 customization options and click Ok.
PART 04
Since Rufus can now bypass the minimum requirements for Windows 11, you can select the type of bootable USB you want to make. If prompted with another confirmation, click Ok.
Your Windows 11 bootable USB drive will now be in the making. This step may take a few minutes to complete.
Step 02:
Install Windows 11 from ISO Step by Step
Now that you have created a bootable drive using the ISO file, you can now begin installing Windows 11. Here is how:
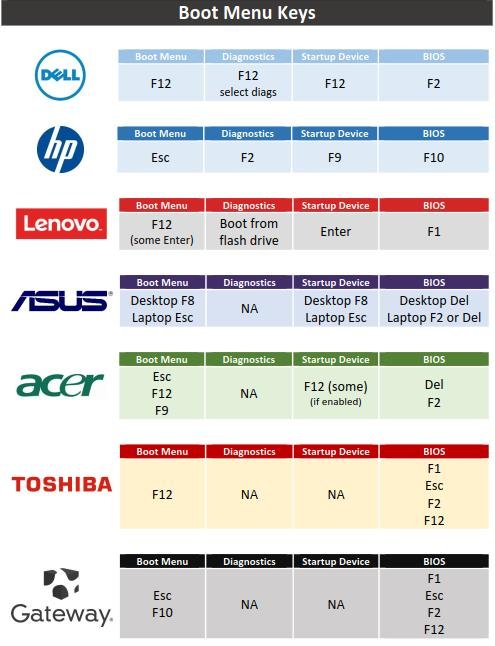
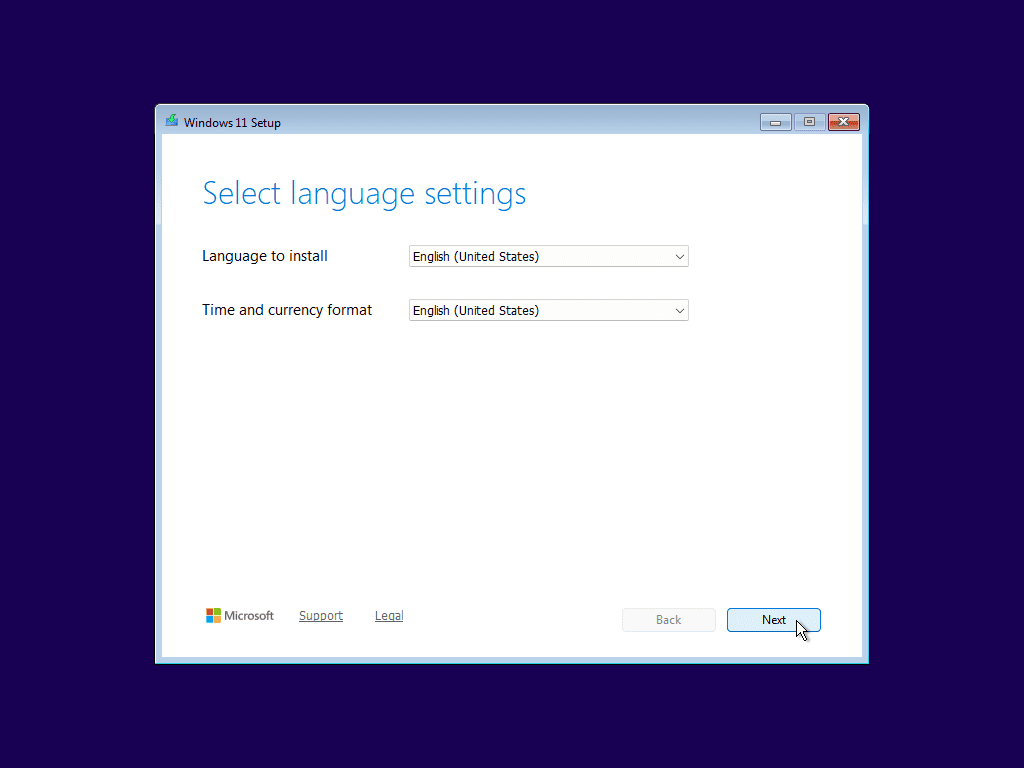
Confirm that the target PC meets the minimum Windows 11 requirements (discussed above). Plug in the bootable Windows 11 USB flash drive in the target computer. Turn on/reboot the computer and open its One Time Boot Menu (Usually through the F12, F10, F9 or Esc button). Select the external USB drive to boot from the bootable USB. You will now see a menu such as the one below. Click “Next.”
Step 03:
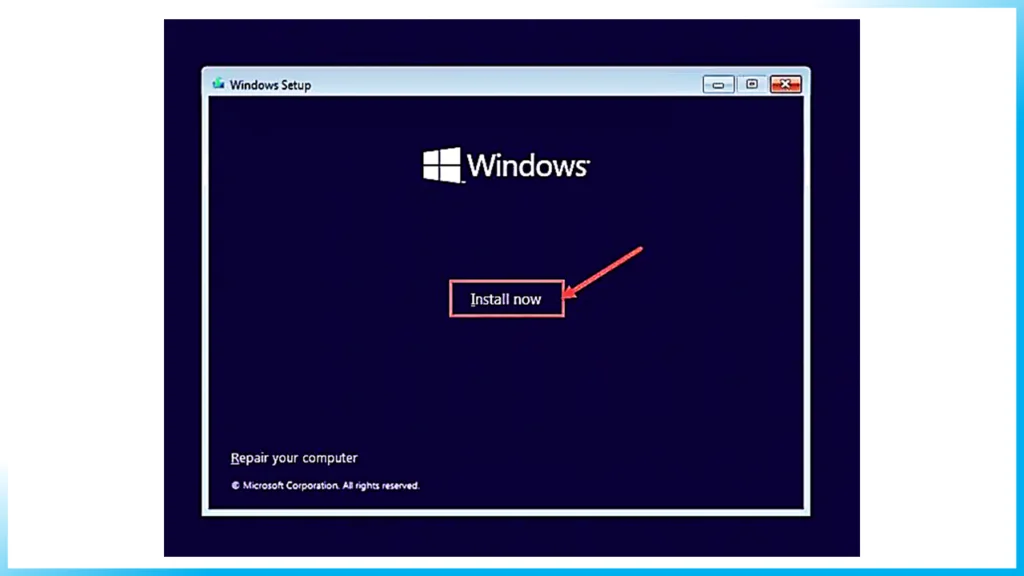
Click on “Install Now”
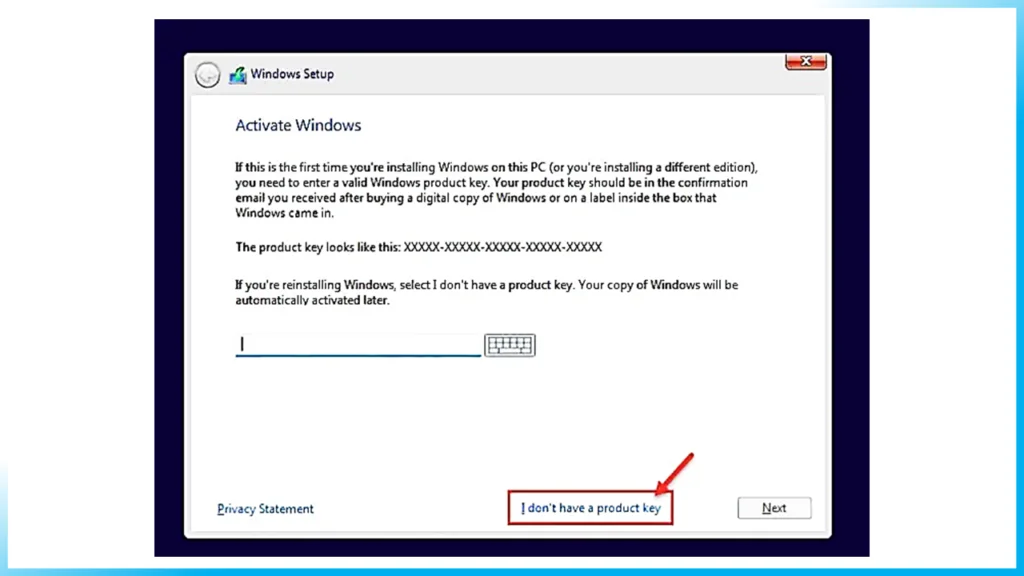
Step 04:
On the next screen, click “I don’t have a product key.”
Even if you do have one, you can activate the product later after installation.
Step 05:
Select the edition you want to install on this device from the list. When selected, click Next.
Check If Your PC Is Compatible
First, download and run Microsoft’s PC Health Check tool from microsoft.com. It will tell you exactly what’s stopping the upgrade.
Common Blockers
- No TPM 2.0 — TPM 1.2 or no TPM chip
- Old processor — Intel 7th gen or older, AMD Ryzen 1st gen
- No Secure Boot — Legacy BIOS mode
Method 1: Enable TPM in BIOS (Try This First)
- Restart PC and press F2/F12/Delete to enter BIOS
- Look for “TPM”, “PTT” (Intel), or “fTPM” (AMD) settings
- Enable it and save
- Try Windows 11 upgrade again
Method 2: Use Microsoft’s Official Workaround
Microsoft themselves published a registry workaround for TPM 2.0 bypass:
- Open Registry Editor (regedit)
- Navigate to: HKEY_LOCAL_MACHINESYSTEMSetupMoSetup
- Create DWORD: AllowUpgradesWithUnsupportedTPMOrCPU = 1
- Restart and run Windows 11 installer
Important Warning
Microsoft may not guarantee updates on unsupported hardware in the future. For best results, consider upgrading your PC hardware or purchasing a Windows 11 compatible system.
Need a Genuine Windows 11 License?
Dunhil Collection LLC provides genuine Windows 11 Home and Pro licenses. Email delivery within 24 hours. WhatsApp: +92 309 5595705